Freeze drying has become one of the most popular methods for preserving food both at home and commercially. But what exactly is it? And is owning your own freeze dryer worth the initial investment? (Yes, it is an investment, but spoiler alert: I think it’s totally worth it, especially if you have a vegetable garden!)
Let’s look at what freeze drying entails, what type of equipment and space you’ll need to set up a freeze dryer at home, and the best ways to get the most bang for your buck. I’ve got tons of tips for beginners to help you get started, whether you’re looking to make some tasty fruit snacks for your family or create shelf-stable meals for emergencies.
By the end of this article, you’ll be ready to start preserving your own food like a pro.

This post contains affiliate links, which means I earn a small profit when you click on the link and purchase my recommendations. As an Amazon Associate I earn from qualifying purchases. Thanks for supporting my small business!
WHAT IS FREEZE DRYING?
Freeze drying (or lyophilization, if you’re feeling fancy) is a multi-step food preservation method. It uses specific equipment to first freeze food and then create a vacuum wherein water molecules can be removed without ever passing through a liquid state.
This method retains the food’s original flavor, texture, and nutritional profile far better than others. And thanks to the low water activity of freeze-dried food, it’s shelf stable for decades if properly stored.
Fun Fact
Freeze drying was first developed during WWII for medical purposes (which makes it pretty new compared to other food preservation methods). NASA then perfected the technology for making space-bound meals for astronauts.

WHY CHOOSE FREEZE DRYING?
Freeze drying has many advantages over more traditional food preservation methods like dehydration. Let’s look at each one so you can decide if the cost of an appliance may be worth it for you.
1. Application Variety
The freeze-drying process works for almost any fruit or vegetable, plus complete meals like soups, casseroles, and guacamole. You can make your own cereal, ready-to-eat snacks, smoothie mixes, and even emergency relief meals.
When I first got my freeze dryer, I was excited to extend the life of my garden harvests. But I soon realized I could use my new appliance for so much more than preserving bell peppers, herbs, and strawberries.
2. Whole Food Nutrition
Freeze-dried food retains more of its original nutrients than dehydrated food. You can lock in all of the vitamins and minerals your fresh garden harvest offers. You can fill your pantry with high-quality, minimally processed, clean food — no need for synthetic or artificial ingredients.
3. Original Form and Flavor
Freeze drying food, for the most part, allows you to keep a food’s original color, shape, texture, and flavor. When you’re ready to enjoy your freeze-dried food, all you have to do is rehydrate it and you’ll get something very close to its original fresh form.
4. Customization
You can customize the finished product based on your food preservation goals. You can, for example, reduce fruits and vegetables down to fine powders for use in smoothies. You can cut ingredients into different shapes and sizes for tossing into the pan later. You can prepare whole meals and then make them lighter and therefore more portable.
5. Prolonged Shelf Life
The moisture content inside food invites rot and bacterial growth, limiting its shelf life. Freeze drying removes anywhere from 95 to 98% of water from food. While the resulting shelf life varies from product to product, you can expect your food to be good for years, if not decades, assuming proper packaging and storage, of course.
6. Simple to Use
Once you’ve got your freeze dryer installed, using it is as simple as pressing a few buttons. Machines have automatic cycles and internal sensors that monitor the temperature and moisture levels of the food, so there’s little to no guesswork involved. It’s super easy and convenient.

HOW DOES THE FOOD FREEZE DRYING PROCESS WORK?
There are three steps in the freeze drying process. The goal is basically to vaporize ice crystals to gas without ever letting them melt to a liquid state. That avoids damaging the cell walls, which ensures the quality and safety of the final product.
Here are the steps to freeze drying:
Step 1: Freezing
Food is rapidly frozen under pressure at a very low temperature (somewhere between -30 to -50°F) that retains the original shape of the food.
Step 2: Primary Drying
This step involves something called sublimation. Basically, the ice crystals formed in step 1 are vaporized under pressure and mild heat, without ever moving through the liquid state. A vacuum pump then pulls the resulting water vapor from the chamber. This step removes about 90% of the water content from a food.
Step 3: Secondary Drying
This last step removes an additional 1 to 2% of moisture from the food’s surface.
FREEZE DRYING EQUIPMENT & SUPPLIES
Here’s what you’ll need to get started:
Freeze Dryer
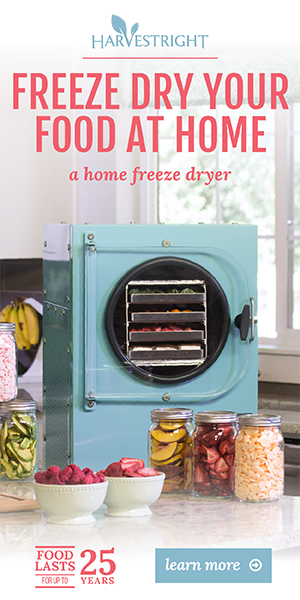
These appliances use specialized equipment to control temperature and pressure. The size, capacity, and cost can vary pretty significantly between brands and models. Popular manufacturers include Harvest Right, Stay Fresh, and Blue Alpine.
I have a Harvest Right, and I love that it comes with an app so I can control the cycle and check in through WiFi. It also has a fun candy mode that my kids love.
Most appliances are pretty large, but Harvest Right now sells the Countertop 360, which at 25.8″ W × 18.5″ D, looks like a large microwave. It can process 5 to 9 lbs. of food per batch.
If you do purchase a freeze dryer, please consider purchasing through my affiliate link. It doesn’t cost you more, and I earn a small commission. Thanks so much for your support!
Sturdy Surface
Your appliance should be set on a flat, stable surface. I recommend a sturdy cart that won’t tip, shift, or rattle during cycles (look for something that can support 250 lbs.). A cart also makes it easier to move your appliance if needed. Bonus: you could place a large bucket on the bottom shelf of the cart for easy drainage after you are done freeze drying your food.
Trays
You’ll also need freeze dryer trays and parchment paper or silicone mats. Most freeze dryers come with a set of trays.
Storing Supplies
To store your finished product, you’ll need:
- Mylar bags and/or wide-mouth mason jars
- Oxygen absorbers
- A mylar bag sealer or vacuum sealer and jar sealer attachment (optional but recommended for long-term storage)
Note: Harvest Right freeze dryers come with 25 mylar bags, 25 oxygen absorbers, and a mylar bag sealer to get you started.

WHAT FOODS CAN YOU FREEZE DRY?
You can freeze dry just about anything — fruits and vegetables from your garden, plus herbs, meats, dairy, and even complete meals. That being said, some foods work better than others.
You might want to keep it simple when you’re first starting out (strawberries and mangoes are a great starting point). That way, you can learn the ins and outs of your appliance. Then, once you’ve gotten the hang of it, you can move on to more adventurous foods, like meat and dairy.
Here’s a thorough list of freeze-dryable foods:
Fruits
Fruits are the most popular and easiest foods to freeze dry. That’s because their natural sugar and acid content help to preserve color and flavor. The end product is attractive and delicious, perfect for tossing into yogurts, cereals, and trail mixes, or just popping right in your mouth.
The best fruits to freeze dry include:
👉Strawberries are a great first food to freeze dry. Here are the complete steps to freeze dry strawberries.

Vegetables
Like fruit, vegetables freeze dry really well, especially ones with low water content. Freeze-dried veggies are great for soups, stews, ready-to-go snacks, and emergency food storage.
Here’s a list of the best veggies to freeze dry:
There are 3 more things I’ll lump in with veggies:
- Edible flowers
- Herbs
- Mushrooms

Meats & Proteins
Meat, seafood, and other proteins can be freeze dried raw or cooked for long-term storage or to make high-protein snacks for on the go. You can also make your own pet treats. Meats are easy to rehydrate and retain their original protein content.
The best meats and proteins to freeze dry include:
- Cooked beef
- Cooked chicken
- Cooked turkey
- Eggs (whole, scrambled, or raw for later rehydration)
- Fish
- Ham and bacon
- Shrimp
- Tofu and plant-based meat alternatives

Dairy
Dairy products can be freeze dried for greater convenience and shelf stability. Freeze-dried ice cream has become a classic astronaut treat.
The best dairy products to freeze dry are:
- Cheese (shredded or cubed)
- Ice cream (including ice cream sandwiches)
- Milk (powdered for baking or beverages)
- Yogurt (chunks or powdered)
Snacks & Ready-to-Eat Foods
In addition to freeze drying single ingredients, you can also preserve snacks and ready-to-eat foods, including:
- Baby food
- Candy and marshmallows
- Coffee and tea
- Full meals (pasta, rice dishes, soups, stews, and curries)
- Pet treats and specialty snacks (liver treats, organ meats, freeze-dried raw food diets)
- Smoothie mixes and fruit powders

Why do some foods freeze-dry better than others?
The best candidates for freeze drying are foods that have the right structure to withstand freezing and sublimation without collapsing or turning mushy. That’s why the following food groups don’t freeze dry very well:
- Foods high in fat or oil, like peanut butter, butter, pure chocolate (fat doesn’t sublimate and can turn rancic over time)
- Foods with a very high sugar content like jams, syrups, and baked goods (these foods don’t dry completely and can remain sticky)
- Foods with high moisture but little structure, like cucumbers and watermelon (these foods lose their shape and/or become spongy)
FREEZE DRYING TIPS FOR BEGINNERS
Choose the Right Location for Your Freeze Dryer
The only tricky part about setting up your freeze dryer is choosing the best location. These machines generate a lot of heat while they’re running, so they shouldn’t be placed somewhere that’s already warm, like a hot garage. Ideally, they should be placed in a cool basement or well-ventilated laundry room.
You also want to pick a spot that’s far away from bedrooms since they can produce quite a bit of noise during their 1 to 2-day cycles.
Lastly, you need to have a place to drain the water pulled from the food, so think a bucket, a utility sink, or a drain pipe nearby. This will simplify cleanup.
Learn How to Use Your Freeze Dryer
Take some time to familiarize yourself with your new appliance. Read through the user manual and any reference guides sent by the manufacturer so you know about any model-specific settings, recommended drying times, cleaning procedures, and maintenance steps.
Perform Routine Maintenance
Freeze dryers should be cleaned regularly according to the manufacturer’s instructions. Make sure to unplug the equipment before cleaning. Use caution when cleaning around the condenser and heating elements to avoid dislodging any wiring.
If your machine has an oil-based pump, you’ll need to change the oil based on the manufacturer’s recommendation to help your freeze dryer last as long as possible.
EASY FREEZE DRYING STEPS
Step 1: Prepare the Food
Before freeze drying, cut everything into small, uniform pieces. Since thinner pieces of food will take less time to freeze dry, this helps ensure everything dries more evenly. Common extension guidance recommends keeping most foods between ¼ and ½ inch thick.
I’ve got a couple more tips for food preparation below based on what you’re freeze drying.
Preparing Produce
Select the best produce for preservation. With berries, for example, I pick firmer ones instead of overripe ones for the best texture when they’re finished.
Thoroughly wash any produce and dry it well before peeling and cutting. Extra water on the food can add to the overall drying time.
To limit darkening or browning, pick a pre-treatment option. This inactivates ripening enzymes and dramatically improves the quality of your final product. Pre-treatments include:
- Blanching: Blanching involves briefly boiling and then plunging into ice water to stop the cooking process. Most fruits and veggies can be blanched.
- Ascorbic acid solution: This is the best option for produce that can’t be blanched. Dip in a solution of 1 teaspoon ascorbic acid to 1 gallon cool water.
Remove any stems and green tops on fruit. I like to slice berries ¼ to ⅜ inch thick. Again, try to keep everything fairly uniform so they finish drying around the same time.

Preparing Meat, Poultry, & Seafood
Add any seasonings you desire to raw or cooked foods before freeze drying.
For something like ground beef, you’ll cook it, drain it, and then rinse it thoroughly with water to remove as much grease as possible before freeze drying. Remember, foods that are super high in fat or oil tend to not freeze dry as well.
If you’re working with wild game, cut the meat into pieces no thicker than 6 inches and then freeze it before preparing it to kill any parasites. It should be kept at 0°F or below for 30 days.
Cut meat pieces no thicker than about ¾ inch to help them freeze and dry evenly.
Step 2: Pre-Freeze the Food (Optional)
You don’t have to freeze your food before putting them in a Harvest Right freeze dryer. The machine will freeze everything for you as part of the cycle.
That being said, I like to pre-freeze my food when I can. After cutting, arrange the food on the freeze dryer trays and place the trays in the freezer until the pieces are frozen solid.
While not necessary, pre-freezing shortens the amount of time the freeze dryer needs for the initial freezing stage.
Step 3: Load the Trays
Spread the food in a single, even layer to fill each freeze dryer tray. It’s okay for pieces to be fairly close together, but try not to overlap or stack them too much. They’ll freeze dry more evenly; plus, it’s easier to check that every piece is completely dry when the cycle is finished.
Only place similar foods (those with similar moisture content) on the same tray. You don’t want to mix foods that will dry at different speeds. Keeping sizes and types of food consistent helps the process go smoothly and gives you better, more reliable results.
As for how much food you can fit on each tray and how long it will need to be freeze dried, you should follow the manufacturer’s instructions for your specific brand and model.
Once the trays are full, load them into your freeze dryer. Now you’re ready to start the cycle!
Pro Tip
If you intend to rehydrate your freeze-dried food, it’s a good idea to weigh each tray with the food both before and after the freeze drying process. The weight difference comes from moisture removal, so this gives you an idea how much liquid to use when rehydrating the food.
Step 4: Run the Freeze Drying Cycle
Place the trays in your freeze dryer, close the door, close the drain valve, and start the cycle. The machine handles the freezing, vacuum, and drying stages automatically, so there’s not much you need to do once it’s running. Follow your user manual carefully!
How Long Does It Take to Freeze Dry Food?
The time to freeze dry varies depending on the food type, the moisture content, how full the trays are, and the thickness of the pieces. I’ve found, for example, that extra juicy strawberries I cut into thick slices took almost 20 hours longer than less juicy, thinner pieces.
Don’t rely on time alone to decide when something’s finished. Always check the food for moisture before you package it for long-term storage.
Also, don’t rush the process. It’s tempting to open the door early as soon as things look dry, but some foods can look done on the outside while still holding moisture in the center.
Step 5: Test the Food for Dryness
Once the cycle is completed, check a few pieces from different trays to make sure they’re completely dry. The appliance might process different foods unevenly, so you’ll want to check multiple samples.
Cut or break each piece in half and look for any dark spots in the center that might indicate moisture remaining. The food should be completely dry and crisp with no cool, soft, or damp spots. If you see any dark spots, return all the trays to the appliance and follow the directions from the manufacturer to run their recommended extra drying time.
If everything looks completely dry, package the food as soon as possible. Freeze-dried products can quickly absorb moisture from the air.
HOW TO PACKAGE & STORE FREEZE-DRIED FOOD PROPERLY
Freeze-dried food absorbs moisture quickly (even just the humidity in your kitchen), so you’ll want to get them stored in appropriate containers ASAP. The best way to store your freeze-dried items depends on how you plan to use them.
For short-term storage, airtight mason jars work well. They’re easy to open and reseal, and they don’t require oxygen absorbers. This is a great option if you plan to open and close the containers frequently, like for snacking.
For long-term storage (up to 25 years), I recommend mylar bags with oxygen absorbers. They will protect your food from light, air, and moisture so it stays fresh until you’re ready to enjoy it.
Whichever method you choose, make sure to label the container with the date, the type of food, and whether it’s raw or cooked. Store it in a cool, dry, dark place for the best quality.

How to Seal Freeze-Dried Food in Mason Jars
Fill a clean, completely dry mason jar with your freeze-dried food, leaving a little room at the top.
Make sure the jar rim is clean before placing the lid on the jar. Use a mason jar vacuum sealer to remove the air and seal the lid. Once sealed, check that the lid is secure before storing the jar.
How to Seal Freeze-Dried Food in Mylar Bags
For longer-term storage, place the freeze-dried food in a mylar bag and add the appropriate size oxygen absorber.
Remove as much excess air as you can without crushing the finished product, then use an impulse sealer to heat-seal the top of the bag.
You’ll need to work quickly once you open your package of oxygen absorbers since they absorb oxygen as soon as they’re exposed to air. Seal any unused absorbers back in an airtight container right away.
Note: Don’t package any soft freeze-dried foods for long-term storage. These have likely already absorbed too much moisture and should be enjoyed sooner rather than later.
TIPS FOR THE BEST FREEZE-DRIED FOOD RESULTS
After freeze drying different types of food, you’ll quickly figure out what works best (and what your family enjoys). Here are a few tips that can make your batches even better:
- If you’re freeze drying produce, cut it up so that the slices are similar in size. Similar thickness ensures everything finishes drying at about the same time.
- Foods with lots of moisture, like extra-ripe berries, may need additional dry time. Always check the thickest pieces before removing the trays.
- Avoid overcrowding the trays. You can place food pieces fairly close together, but don’t overlap or stack them.
- Be careful mixing different foods in one batch since foods with different moisture levels typically don’t finish at the same time. If you do mix foods, check each type carefully before packaging.
- Save any crumbs and powder when freeze drying fruit. Stir these little bits into yogurt or oatmeal or blend into smoothies.
- Package your results quickly. Some foods, like berries, start absorbing moisture from the air immediately, so have your jars or mylar bags ready before you even take the trays out.
EATING & ENJOYING FREEZE-DRIED FOODS
You can enjoy your freeze-dried foods in their dried state or rehydrated, depending on what it is and how you want to use it. My family’s favorite freeze-dried food is strawberries, which we often eat straight out of the jar. They’re such a great snack.
Here are some other tips for enjoying your freeze-drying efforts:
Cooking
If your food needs to be cooked before eating (think pasta, grains, meat, seafood, or eggs), make sure to cook it to the safe minimum internal cooking temperature after rehydrating it, the same as you would non-preserved food.
Fruit Powders
I love making powders from freeze-dried strawberries, mangos, and other fruits. Just add the freeze-dried fruit to a blender or food processor and blend until you have a fine powder. Add the powder to frosting, smoothies, yogurt, oatmeal, lemonade, or baked goods. Store any leftover powder in an airtight container.
FREEZE DRYING FAQs
What is the difference between freeze drying and dehydrating?
While these are both popular methods for preserving food, they use completely different processes and yield totally different results. Dehydrating involves removing moisture from food. People have left food out in the sun to dehydrate for thousands of years, and nowadays, you can also use a dehydrator appliance to achieve the same result with heat.
Dehydrating extends a food’s shelf life by a couple of months to a few years. The heat involved can reduce heat-sensitive vitamins; it also alters the food’s flavor, texture, and appearance.
Do I need special equipment for freeze drying?
Unlike food dehydration, freeze drying doesn’t mimic any process that happens in nature. It’s actually a relatively recent innovation that involves specialized equipment to freeze the food at extremely low temperatures (around -40°F), create a vacuum, and then convert water molecules directly into water vapor. These machines are pricey, but they’re incredibly useful, easy to use, and efficient.
How long does freeze drying take?
Foods take anywhere between 20 to 48 hours, depending on the type and amount of food you’re freeze drying. Several factors (like thickness of slices and moisture content based on ripeness) can affect total drying time even within the same type of food. Expect meat and thick food, like complete meals, to take 2 full days to dry.
Where should I put my freeze dryer?
The ideal spot is cool, well-ventilated, and far from bedrooms, perhaps in a laundry room or basement. You want to avoid areas that become hot, like garages, since high temps can affect the appliance’s performance.
Does freeze drying preserve food’s nutrients?
Freeze drying retains most of the food’s nutrients. Compared to other preservation methods, it’s an optimal way to preserve your garden harvest while it’s at its nutritional peak instead of letting produce spoil.
Is freeze drying expensive?
While the initial cost of a freeze dryer is steep, you might think of it as a long-term investment. The cost per cycle is relatively low considering how many pounds of food you can process. It’s also low compared to the price of buying the same freeze-dried foods. I certainly feel like I’m getting my money’s worth from my freeze dryer.
Can you freeze dry liquids?
You can freeze thicker liquids like soups, sauces, and even raw eggs. I recommend pre-freezing these foods flat in trays in your freezer before running a freeze drying cycle. Be careful with sugary liquids as these tend to foam up and explode within the freeze dryer.
What are the maintenance requirements of a freeze dryer?
You’ll need to clean the machine regularly and follow any maintenance instructions from the manufacturer. If your machine has an oil-based pump, you’ll need to change the oil based on the manufacturer’s recommendation. This helps your freeze dryer last as long as possible.
Can freeze-dried food be rehydrated?
In most cases, rehydrating freeze-dried food quickly returns it to its original structure, texture, and flavor. All you have to do is add water.
Is freeze drying safe?
When done correctly, freeze drying is an incredibly safe and effective way to preserve food long term. Make sure you’re following the manufacturer’s guidelines for max safety. I’ve included more safety tips below.
What’s the shelf life of freeze-dried food?
Freeze-dried food can last anywhere from 10 to 25 years as long as it’s properly stored.

FREEZE DRYING FOOD SAFETY
Whenever you’re preserving food, it’s important to follow proper food handling procedures to minimize the risk of foodborne illness. Because there’s no heat treatment involved in the freeze drying process, illness-causing microorganisms like bacteria and viruses that are present on the food aren’t killed. They can actually start growing again once moisture is reintroduced to the food. That’s why proper storage of freeze-dried foods to keep out moisture is really important.
With that in mind, follow these food safety tips:
- Wash your hands thoroughly beforehand.
- Store ingredients at safe temperatures in a spot free of contamination.
- Cook foods to minimum recommended internal temperatures and cool per guidelines.
- Prevent cross-contamination of allergens.
- Maintain clean and sanitized kitchen spaces.
- Wash and sanitize the trays after each use, even if you’re about to freeze dry another batch of the same food.