If you’ve ever stood in the garden aisle completely overwhelmed, or scrolled through hundreds of gorgeous garden photos and had no idea where your own would even begin, this post is for you.
I’ve been gardening for over 20 years, and I still remember how confusing it was to start. There’s a lot of advice out there, and most of it assumes you already know the basics.
This is the guide I wish I’d had when I started: gardening for beginners, in the order that actually matters, without the overwhelm.

This post contains affiliate links, which means I earn a small profit when you click on the link and purchase my recommendations. As an Amazon Associate I earn from qualifying purchases. Thanks for supporting my small business!
STEP 1: FIGURE OUT WHAT YOU’RE ACTUALLY WORKING WITH
Before you buy a single plant, spend a week just observing your space (yes, really).
The first thing to note: Where does the sun hit, and for how many hours a day? Most vegetables and flowering plants need at least 6 hours of direct sun. (If you’re observing your yard in the summer, keep in mind that fall and spring will mean even fewer sunlight hours.) So if your yard is mostly shaded, that changes everything about what you should plant.
You can still have a garden with less than 6 hours of sun a day. You’ll just need to focus on herbs and leafy greens, plants that don’t require as much light to produce. Refer to the chart below to determine what you can grow based on how much sunlight you have.

Here are some other basics to take stock of:
- How much space do you have?
- What’s your native soil like? Is it dark, crumbly, and fertile? Does it have a clay-like consistency? Or is it loose like sand?
- How’s the drainage situation? Is the ground dry and cracked? Does water pool in your yard after rain?
- Do you have a water source like a faucet or rain barrel?
- How much time can you realistically give a garden each week?
If you pay attention to the words I highlighted, then you already know the most basic requirements for starting a garden: sunlight, space, soil, drainage, water, and time. You can have a garden with the bare minimum of one or more of these things, as long as you take that into account during the setup. A garden that matches your actual life will always beat one built around what looks good in photos.
👉Limited on space (or time)? Here are our favorite gardening ideas for small spaces and low commitment.
STEP 2: FIND YOUR FROST DATES BEFORE YOU PLANT ANYTHING
This is the step almost every beginner guide skips, and it’s the one that causes the most heartbreak. Timing is really the whole game. A matter of weeks can make the difference between a tomato plant that gives you baskets of fruit and one that dies overnight.
To nail the timing, you need two numbers: your average last frost date in spring and your average first frost date in fall. Search your zip code along with “last frost date” and write both down.
Here’s how to use them:
Before Last Spring Frost
Four to 6 weeks before your last spring frost, you can plant cool season crops like lettuce, spinach, radishes, peas, and broccoli. These plants tolerate light frost and actually taste better in cool weather. If you’ve tried to grow lettuce before, only to have it immediately flower and/or taste bitter, it’s because the weather was too warm.
After Last Spring Frost
Warm season crops like tomatoes, peppers, beans, squash, and zucchini go in after your last spring frost has passed, once the soil has warmed up. These plants can’t tolerate frost at all. I even like to wait a week or two after my last frost date to plant something like cucumbers just to make sure.
Before First Fall Frost
You can plant cool season crops again in the late summer for a fall harvest. Just wait for your temps to drop below 85°F (29°C) or so. These plants can stay in your garden when frost is in the forecast, but it’s still a good idea to cover them with some old sheets.
👉Learn more about protecting your plants from cold snaps.


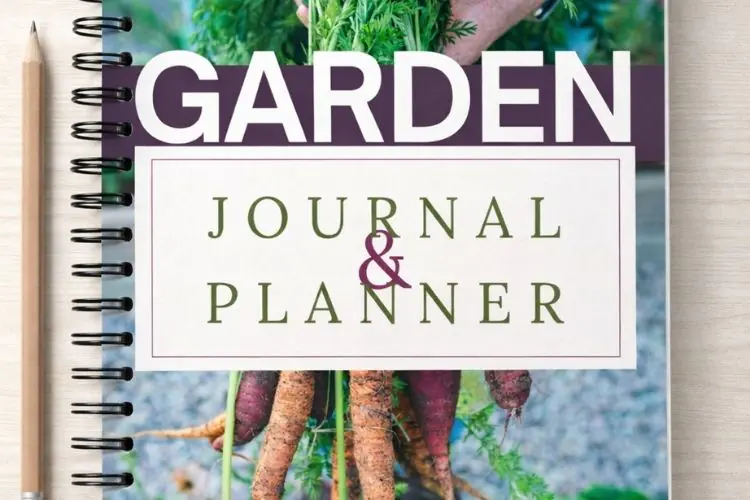
LETTUCE GROW SOMETHING PLANNER AND JOURNAL
For more help planning out your plants by season, grab our easy garden planner that takes you step-by-step planning your garden.
$12
STEP 3: DECIDE BETWEEN CONTAINERS, RAISED BEDS, OR IN GROUND
This is the first real decision every beginner has to make, and there’s no universally right answer. It just depends on your space and how much you want to invest upfront. Let’s look at the pros and cons of each one.
Containers
Pros
Containers are the lowest-commitment option. You just grab some grow-ready containers (make sure there’s a good drainage hole in the bottom) and add soil. Containers are perfect for small spaces, including patios and decks. They’re also ideal if you’re renting and might move.
Cons
Containers aren’t ideal for larger root crops like carrots or sprawling fruiting plants like melons (though there are plenty of container-friendly varieties for just about any plant you might want to grow these days).
The soil in containers can dry out quickly, so you’ll need to stay on top of garden maintenance.
👉Check out our guide to container gardening for beginners for tips on how to get started.

Raised Beds
Pros
Raised beds give you the most control over soil quality and are ideal if your native soil isn’t great. (Remember when I asked about your soil? Neither loose, sandy soil nor heavy, clay-like soil is ideal, but most of us have one or the other. You can get around poor soil and even bad drainage by starting completely fresh in a raised bed.
Raised beds are also great if you want a defined, tidy space.
Cons
Raised beds cost money to build and fill. You’ll want to avoid using certain materials that could make an edible garden unsafe.
👉If you plan to build your own raised beds, these are the mistakes to avoid before you start.

In-Ground Garden Beds
Pros
This is the least expensive option if your soil is already workable. You can just dig in.
Cons
Most of us will need to amend the top 12 or so inches of soil before it will have the right texture and nutrient composition for supporting vegetables. Amending can require a lot of effort over a 6- to 12-month period.
If you’re growing in the ground, I recommend outlining the space with metal edging. Not only does this help keep weeds and grass out of the vegetable garden, it may also prevent unwanted foot traffic on your radish sprouts.
👉If you’re short on space, a handful of small backyard gardening ideas can help you figure out what fits.
STEP 4: START SMALL
Beginner gardeners tend to be an enthusiastic lot, and that leaves many of us with more garden space than we’re ready for. I recommend starting with one raised bed or three or four containers. That’s it.
It’s tempting to plant everything you’re excited about all at once, but a smaller garden that you can actually keep up with will teach you more — and bring you more joy — than an ambitious one that gets away from you by July. Once you know what you enjoy growing and what your space can handle, you can expand.
Now, this doesn’t mean you can only grow a couple of plants. You can fit a surprising number of plants in just one 2×4 garden bed. (I’ll talk more about planting layout in a bit.) And you’ll want to have a variety of plants growing so that you’re always excited to go outside and check on them. A boring garden becomes, all too quickly, a neglected garden.

STEP 5: GET THE SOIL RIGHT
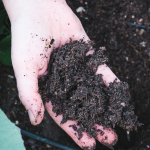
More beginner gardens fail from bad soil than from bad luck. Good soil has a crumbly texture, drains well, and contains lots of organic matter. I regret to inform you that’s probably not the compacted dirt that’s often left behind in backyards after home construction.
If you’re using containers or one small raised bed, a quality bagged soil mix solves this instantly. If you need more soil than a couple bags provide, it is possible to create your own healthy soil mix on a budget.
If you’re planting in the ground, plan on amending your existing soil with compost and perhaps coarse sand (to improve drainage) before you plant anything. Make sure to avoid pesticides and herbicides in the area.
👉Follow our simple formula for the ideal soil to fill a raised-bed vegetable garden.
👉Use our easy calculator to figure out how much soil you’ll need.

STEP 6: PICK BEGINNER-FRIENDLY PLANTS
Some plants are far more forgiving than others. As a beginner, stack the deck in your favor.
Easy Vegetables:
Easy Herbs:
*Grow this one in a container by itself; it spreads aggressively
Easy Flowers:
👉Start real simple with these 5 easy veggies.
👉Discover our favorite flowers to grow in vegetable gardens.
Save the finicky stuff — fussy tomatoes, temperamental broccoli, pest-prone squash — for your second or third season, once you’ve got a feel for your space and the rhythm of your growing seasons.

STEP 7: BUY TRANSPLANTS YOUR FIRST SEASON (SKIP THE SEEDS)
Starting seeds indoors is one of the great pleasures of gardening. It’s also one of the hardest gardening tasks to master. It’s a completely separate skill involving grow lights, trays, and hardening off. You have to be really consistent with seedling care, especially as you move toward transplant time. Trying to learn this skill in the same season you’re learning everything else is how people burn out before their first harvest.
The advantage of starting seeds indoors is the headstart on the growing season. Even if there’s still snow on the ground, you can have a little tomato seed ready to sprout indoors so that it can take off in your garden as soon as your frost date has passed.
Fortunately, you can get that same advantage by buying transplants from your local nursery. A $4 nursery plant saves you six weeks and a lot of guesswork. Sourcing plants instead of seeds is pricier, but it’s what I recommend for your first couple of seasons.
👉 For your first garden, do this:
Buy Transplants
If you want to grow tomatoes, peppers, herbs, flowers, and larger leafy greens like kale, head to the nursery and buy well-grown plant starts. I source transplants for many of my clients, and this always gets them off to a good start.
Pro Tip:
When you’re buying transplants, pick the stocky, compact ones over the tallest ones on the rack. Leggy plants have been stretching for light and rarely catch up.
Direct Sow
There are a couple of plants that are easier to grow by just planting the seed right in your garden (no headstart needed). This includes radishes, beans, peas, lettuce, and carrots. Carrots in particular hate being transplanted, so seeds are the only real option there.
Once you’ve got a season or two under your belt, seed starting is absolutely worth learning. It opens up hundreds of varieties you’ll never find at a garden center.
STEP 8: SKETCH A SIMPLE LAYOUT BEFORE YOU PLANT
Ten minutes with a pencil can save you a season of shaded, disappointing plants. Beginners almost always plant either too close together or leave way too much space between plants. You don’t want plants overcrowded, but you also don’t want lots of bare, exposed soil in between plants.
Here’s the trick: Learn how wide each plant will become when it’s full grown. That’s how much space to leave in between your plants — no less and no more. If plants start touching leaves with their neighbors, you can always come out and do some pruning of the lower, outer leaves.
This is where practicing the Square Foot Gardening method can be really helpful. Instead of planning out an entire bed, you plan out each little square.
👉Find more tips to plan your garden, plus a free Square Foot Gardening printable.

Here are a couple more spacing tips to follow:
- Put tall things on the north side so they don’t shade everything behind them. Tomatoes, pole beans, sunflowers, and trellises all go along the back edge.
- Plant trailing plants along the edge. You can put things like trailing rosemary, oregano, and thyme right up next to the side of the raised bed or container. Just train their growth over the side. It saves space and it looks really pretty!
- Leave yourself a way in. You need to be able to reach everything without stepping in the bed. This goes for in-ground beds and wide raised beds.
Here’s a simple 2×4 raised bed that works for a first garden:
- North edge: 3-4 tomato plants, staked or trained up panel or obelisk trellises
- Middle: 2 zucchinis, 4 basil plants, a row of bush beans
- South edge: alternate your favorite perennial herbs with low-growing annual flowers like petunias or alyssum
That’s a real garden. It’ll feed you, it won’t overwhelm you, and it fits on a single sheet of paper.
STEP 9: WATER CONSISTENTLY, NOT JUST OFTEN
New gardeners tend to either overwater out of anxiety or forget entirely once the initial excitement fades.
Pro Tip:
Overwatering doesn’t mean giving a plant too much water in one day. It means coming back and watering again before the soil has had a chance to dry out a bit. Most plants don’t like the soil around their roots holding on to way too much water. It can lead to root rot and other issues.
The goal is consistency: check the soil with your finger before watering, and only water if it feels dry. Water deeply rather than a little bit every day. Most vegetable gardens do best with about an inch of water a week, adjusted for heat and rainfall.
👉You can find way more information about the best (and easiest) ways to water your garden in this post.

STEP 10: TAKE STEPS TO PREVENT PESTS
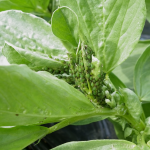
As soon as you build a garden, pests will be on their way over. It’s almost like they have a little notification system: “New garden filled with vulnerable seedlings in your area!” That’s why now, when your garden is new and pest-free, is the time to focus on pest prevention.
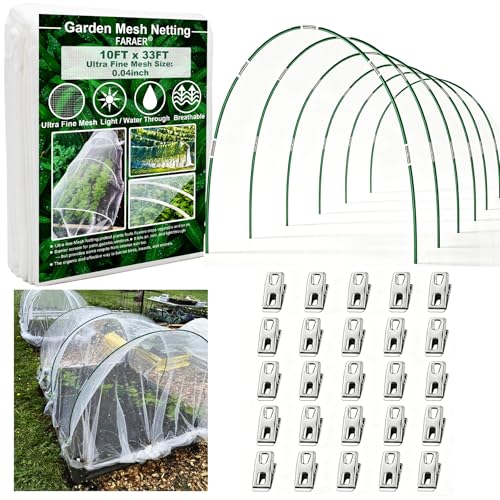
The single best way to keep pests out of your garden is to use physical barriers. Grab some pest netting (aka agfabric) or floating row covers from the garden center. You’ll also need some bricks, landscaping pins, or clamps to secure the edges of your cover, depending on your garden setup. If needed, use garden hoops or PVC pipes to form a tent-like base so you can drape your cover over your beds without touching the plants.
The goal is to cover your garden bed entirely, including all plants and every inch of soil. This prevents adult pests from both feeding on your plants and laying their eggs in your garden.
If you’re growing fruiting plants that require pollination, you’ll need to uncover your plants during the day to allow pollinators access. Otherwise, you can just leave these covers in place at all times except while pruning and harvesting.
Other ways to prevent pests include keeping the soil surface free of mulch and debris, pruning old plant growth, and focusing on soil health.
If you can’t cover, bookmark this page for when pests show up: 6 Tips for Organic Pest Control in the Garden
EXPECT (AND LEARN FROM) MISTAKES
Something will not go as planned. A plant will bolt (go to seed) too early, pests will find your lettuce before you do, or a late-season frost will stress your seedlings.
This isn’t a sign you’re bad at gardening — it’s just… gardening.
Every mistake teaches you something specific about your space that no blog post, including this one, can fully predict for you. View each little mishap as a learning opportunity.
WHERE TO GO FROM HERE
Once you’ve got your first small garden going, here’s where I’d point you next:
- Want more color? Try an easy cutting garden with zinnias.
- Still not sure how to work with a small space? These 25 home gardening ideas for small backyards will help you make the most of limited square footage.
- Building your own raised bed? Don’t skip the most common mistakes. They’ll save you a season of frustration.
Gardening is one of those things you learn by doing, not by reading everything first. Pick one bed, one container, or one small patch of ground — and start. We’ll be here for you the whole way! Let us know if you have any questions or concerns!